
We made use of some great weather early September (yikes – really running behind on writing this blog), to set up the temporary frames and attach the boat frames to them. A spare 18 mm MDF sheet on top of our garden table was our worktable for this work. It provided a large, flat area and access for clamps all round.
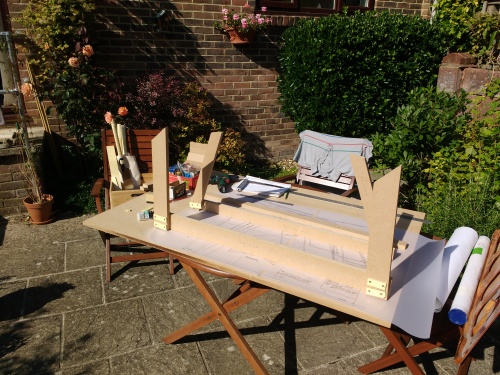
Sunny workstation. The small plywood parts were a makeshift solution for dealing with the slightly too long screws. Yes, one of the standups in the wrong way round. One of many small mistakes made here.
We had already cut MDF to the required dimensions based on measurements taken from Sheet 2 of the plans. Using a sliding bevel, we copied the angles for construction of the temporary frames from the same sheet.
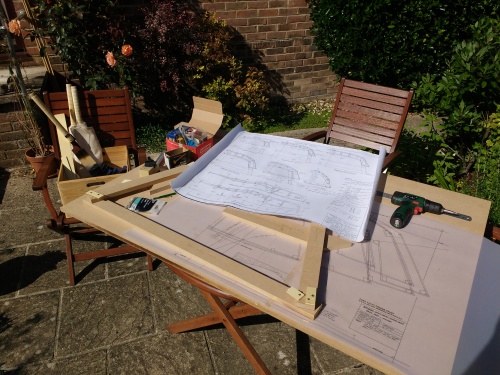
Sheet 1 of the building plans was taped down flat on the large MDF sheet we used as makeshift worktable.
We included the additional vertical supports close to the centre of the frames, as recommended by the class association. These significantly stiffen the temporary frames up, provide support and can help with alignment. If they are installed correctly. We recommend adding them, but take care to leave enough space from the centreline to allow for the wood strips on the outside of the girder to slide it. We didn’t so had to saw them off again. Yet another little error we made in this step.
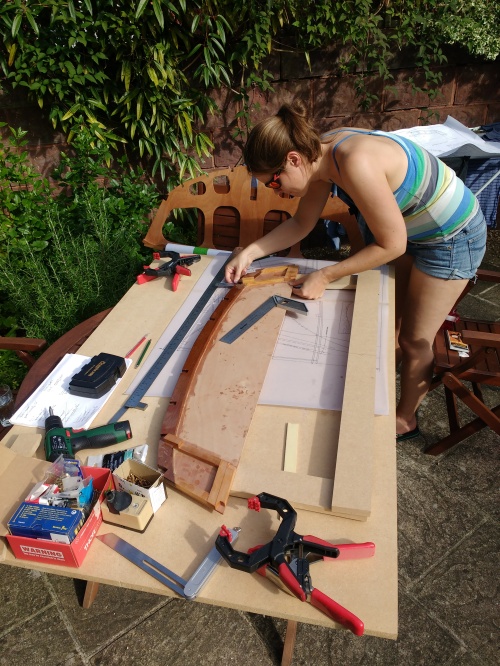
The next step was attaching the boat frames to the temporary frames. This is a bit of a faff, but worked well once we figured it out:
- Start with either port or starboard frames and working through all stations before doing the other side.
- Align and centre the temporary frame to the baseline on Sheet 1 .
- Clamp the temporary frame in this position.
- Use a collection of small squares to line the boat frame to match the corresponding positions on sheet 1 (the plywood frames are the full MDF thickness above the sheet, so this is essential). I would recommend using the inward corners of the stringer and chine cutouts as well as the edges that line up with the girder as orientation points.
- Hold the plywood frame tightly in this position, while screwing it down to the temporary MDF frame. This is where an additional pair of hands is very convenient.
- Check that nothing moved while putting in the screws. Chances are it did.
- Once all frames for one side are glued up, clear the table and flip Sheet 1 to attach the other frames for the other side.
As always, taking your time and working carefully pays off here. We did a lot of double checking.
A first glance, note that the MDF framing isn’t clamped down yet.
The “demi frames”. Notice that the additional vertical supports would snug right up to the girder. This isn’t good. Leave at least 10mm space here.
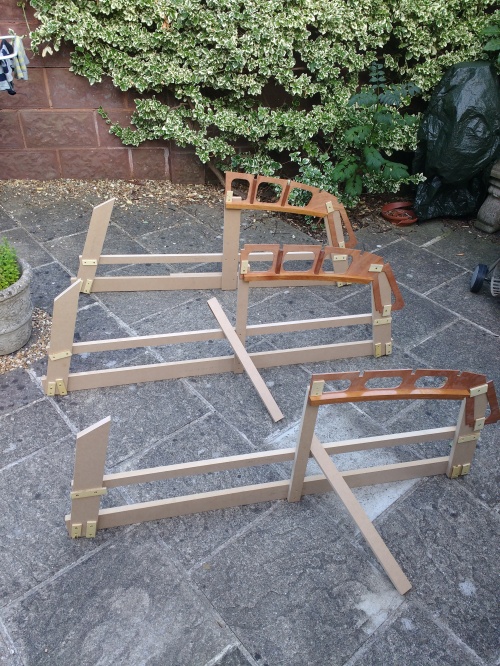
Once the all the framing was done, we couldn’t resist balancing them on the building frame (some many different types of frames in this post … too confusing for me), to get a first real feel for the hull shape.
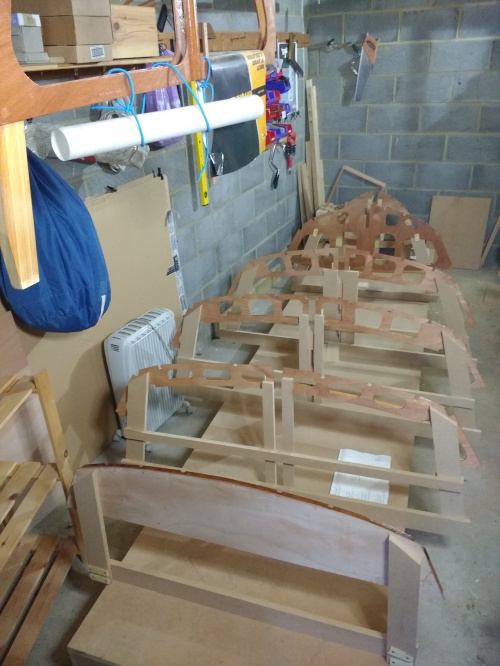
Mockup of the hull shape. A good eye will spot our final and most frustrating error in this step. Yes, the frames are all on back to front, because we installed them on the MDF the wrong way round. *sigh*
We only noticed that we installed the plywood frames the wrong way round on the MDF frames when we started fixing them to the building box. After some back and forth we decided to leave them and pay close attention that when we fastened them, the ply wood was in the correct position. Annoying but less hassle than redoing it all. The frustrating bit is that we had two frames that were initially installed the right way round, but we ‘corrected’ them.
In the end, this was a step that had me really worried initially, but it was quite simple. We did manage to make a series of mistakes, but that was down to our paying attention to the wrong things. No lasting harm was done and we hope that we now have filled the required number of errors to ensure the rest of the build goes smoothly (yeah, right …).
